My 1st Nicole Mallalieu Bag

I was petrified of this bag pattern (the flap totally freaked me out) which I bought back in September and had worked myself up about for 2 months LOL. In the end, with some encouragement from Emma and me repeating to myself that it's only a 1 flower difficulty rating, I started on the bag as a secret santa present for a special cyber friend.

Overall I am happy with the finished bag.

There was no heavy weight interfacing in the shop on the day so I went with shapewell which is very stiff. I'm hoping the bag will relax a little with use.

I wanted to make the strap adjustable but couldn't source a slide buckle in time.

I could only find bronze rings which I love and think match the bag but when I finished I wanted to add a twist turn lock to keep the flap down and could not for the life of me find one anywhere in Melbourne. I had no time to order online so had to use the only one I eventually found by pure luck, which was unfortunately silver.

I originally wanted to use a magnetic catch but I think I missed the step where I was meant to insert it into the flap before stitching it to the bag?? By the time I realised, I was finished and there was no way I was unpicking which is why I thought a twist turn lock would be good, if only I could have found a bronze one :(

I was scared to chop into my bag to insert the lock but all was good and I'm happy with how it looks.

Because of the shapewell, I went a bit nuts trying to iron the bag after turning it inside out (the right way) and was devastated to see that I melted some stitching. At least that's what I think happened? Has anyone ever had disintegrating stitches before? I could have cried!

I also made a matching tissue holder.


and the disintegrating stitches!

Christmas Caroline Dress

I had to make something Christmas-y so with not much time left at all, I made this Caroline Dress for M last night.

She wore it to the hairdressers this morning, here she is in her dress with her new short do.


Before we left


We're off to see Santa tomorrow so I'm trying to finish a pair of Little Explorers for the boy in some red dotty trim, Christmas-y without being OTT. Both new items of clothing will be worn for the Chrissy pic if there are no food/drink disasters between getting dressed and making it to Santa.

Goodie Bags

Miss M, my beautiful, sweet, funny, smart, kind, light of my life daughter turned 6 this week. She had such a lovely birthday and today she had a party.

A month or so ago I started playing around making yoyo's and as I kept making them I thought they would be perfect for M's party bags. It was good to just plod along and make them when I had some spare time here and there.

Then, a few nights ago, I thought it would be great to actually make the party bags. A while back I picked up a bag of 8" long zippers for 50c at the op shop so the whole idea was based on those zips. Since I already had plenty of fabric and had a tute in mind that I wanted to try, it all made sense.

The bags aren't perfect, my zip ends don't quite push up and out enough, I would love to know what the secret is to get them looking better. Otherwise, I was really happy with how they all turned out.

Each pouch had contrast lining


The yoyo's have grown on me, the more I made the better my fabric and button matching became. I sewed the yoyo's to the hairclips in 3 different places to be triple sure they were nice and secure. Annoying and boring (hate hand sewing) but worth it.


I really wanted to give M's friends something sweet and special to say thank you for her lovely gifts. I didn't want any plastic type toys in the bags either and hope the girls will wear their clips and use their pouches. They actually look a lot like pencil cases and are a great size for all sorts of things - hair ties, ribbons, texta's....

Here are the goodies we put in each bag


The ties on the zips were a last minute decision, I thought it would help smaller fingers open the pouches and I also liked the dash of contrast colour it gives each bag.


Happy birthday to my gorgeous girl!

Before the party....


and after the party (looking a little overwhelmed!)

Handmade Kids Giveaway

Lots of generous giveaways happening atm!

Handmade Kids are having a mega Christmas giveaway with boy or girl packs up for grabs. Lots of beautiful items in each pack, I am eyeing off the boys goodies. Good luck!

Retromummy's Giveaway

Another super generous giveaway by Retromummy, such beautiful fabric that would look really great sitting on top of my fabric stash ;-)

Have a look around Corrie's blog while you're there, always lots of beautiful things to see.

My Lucky Day!!

I was so shocked when I read a comment on my blog from the super talented Chelsea of Vintage Chic fame, telling me I had won something on her blog.

I was most likely blog surfing late one night and came across this fabulous giveaway on Chelsea's blog (see entry on Oct 2nd). With over 200 comments including mine, I didn't even give it a second thought, until Chelsea got in touch with me by leaving a comment on my blog to tell me I had won one of her Pink Fig Pattern Packs - OMG wooohooo!!

They have arrived and I can't wait to make.....oh no, which one first?


Thank you SO MUCH Chelsea :-D

Gorgeous Giveaway

Perhaps you know a beautiful little boy or you even have one of your very own who is the right size for this gorgeous little play suit being given away by the lovely Emma.

I'm not sure which is cuter, the suit or little baby Dotty?? Either way, be sure to enter this giveaway for your chance to win this very sweet little suit which was made using one of the very popular Oliver + S patterns.

Happy Belated Birthday Master B

Here are the presents I made for my beautiful nephew's first birthday. Another backpack (my 3rd) and another pair of Little Explorer pants (I've lost count).


Opening Day - What I Made

When I found out I was sewing for one of Mel's kids, I knew I wanted to sew for Jaxon. My first idea was to make a magnetic fishing game but I think in the end time got away from me so I started looking for other ideas. I absolutely love reading vegbee's blogblueprints, she has heaps of fabulous ideas and the most amazing bit is, she has only been sewing for about 3 years, amazing!

A tutorial for a toddler backpack was posted at the start of October and I thought it was so cute and looked perfect for Jaxon. So away I went.

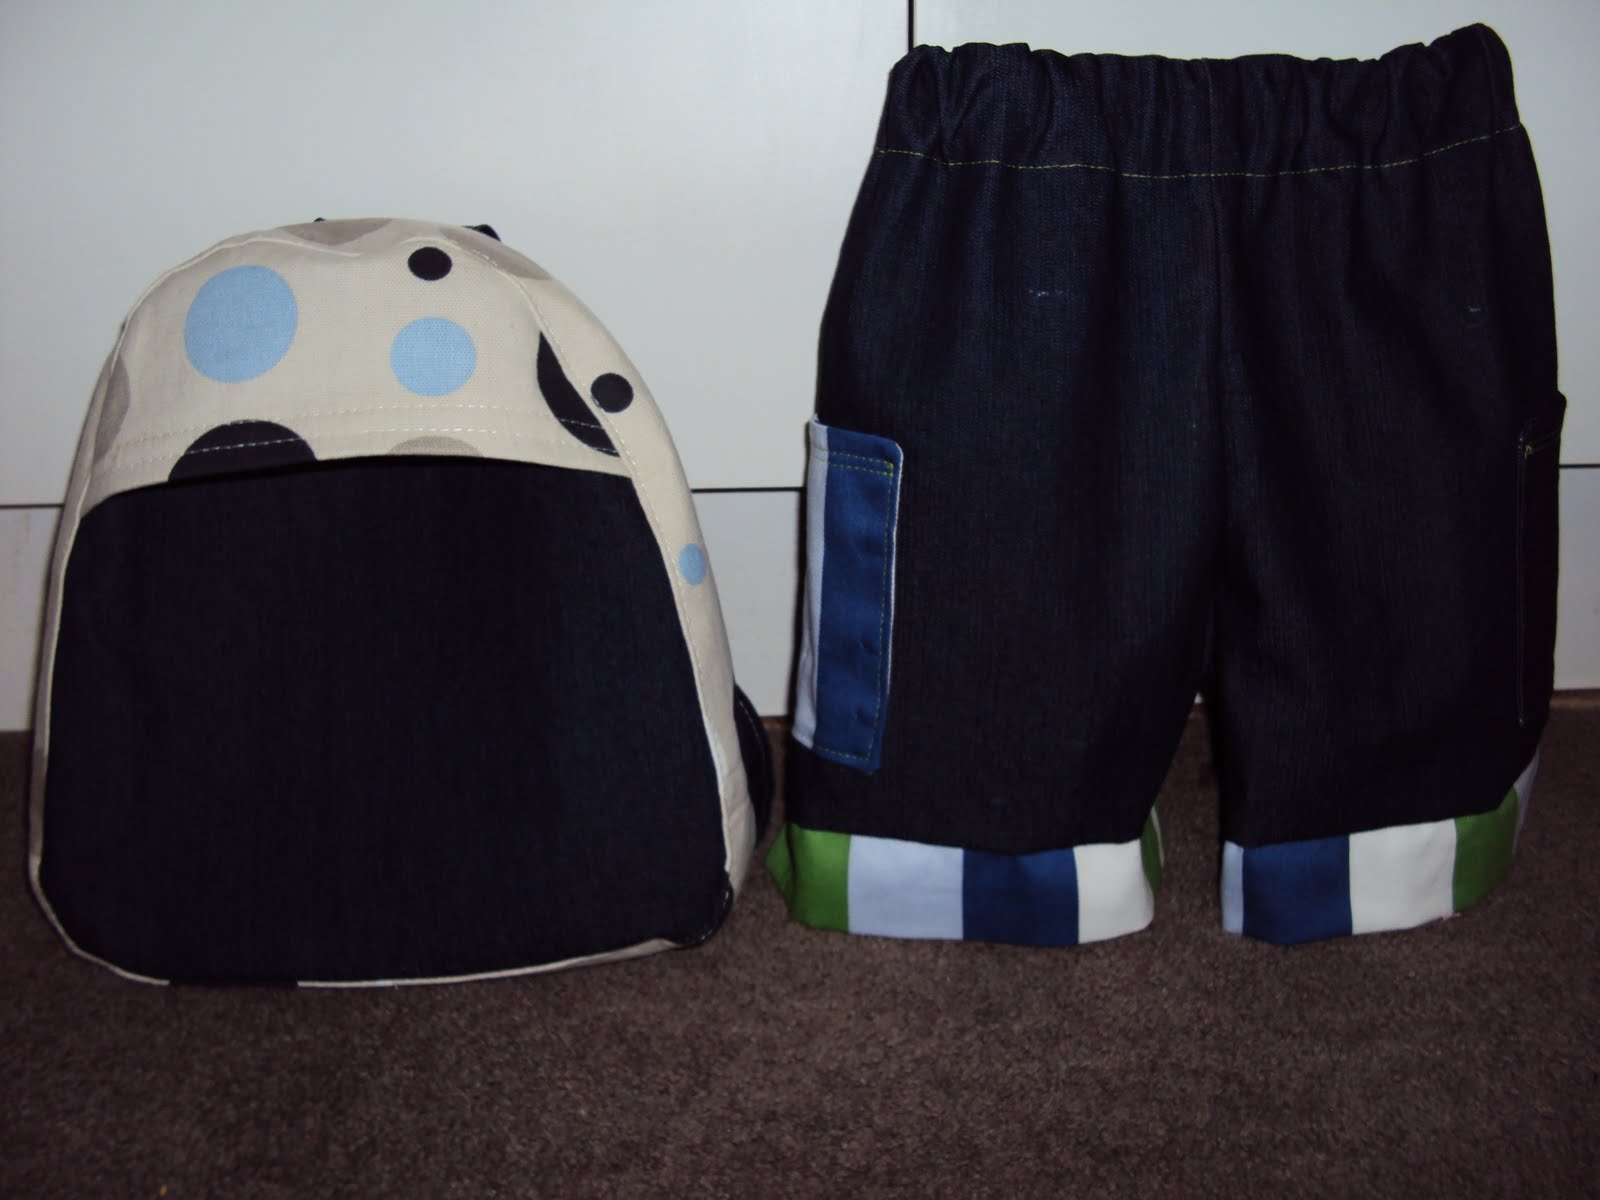
I was so pleased with the result and so was my little man, H. I couldn't resist H's plea's for it so gave in and said he could have it. I wasn't happy with the stitching on one of the straps so felt better about giving it to H instead of sending it to my swap partner. The "pack pack" as he calls it has gone everywhere with us which made me even more excited that Jaxon would surely love his just as much.

I love the egg shape of the bag and also that it has no clasp therefore allowing little hands to easily get things in and out. It's all about independence!

H wearing the backpack which ended up being his


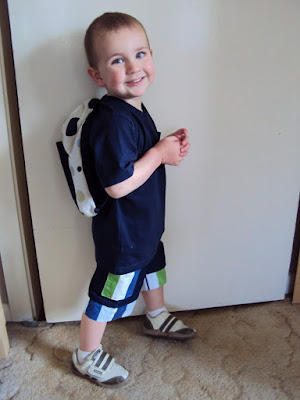
Backpack V2 for Jaxon


Both boys' backpacks side by side, H's on the left, Jaxon's on the right


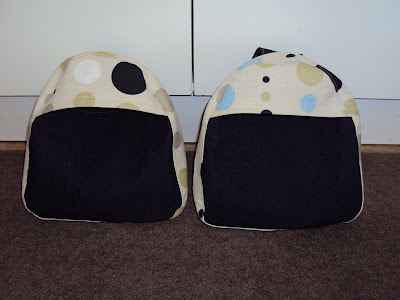
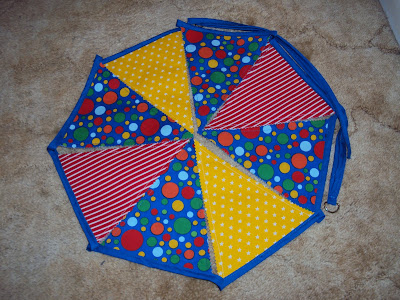
I've wanted to make some bunting for ages and thought this would be the perfect little extra to pop into Jaxon's bag. I searched for a tute and found this tutorial from a blog which has fast become a new favourite to read.

I was originally going to make the bunting only as long as Jaxon's name with the letters of his name on each flag but due to interfacing/shrivelling issues, that idea went out the window lol. The lengths of bias at each end aren't equal but it was strange, I really didn't care! I thought about fixing it but decided to leave it in case Mel ever needed to tie it to something. I'm sure if it bothers Mel she can easily fix it.

I would love to make bunting again but would use lightweight interfacing on each flag next time. I used a mixture of medium and light and the lightly interfaced flags are much nicer, I think the heavy weight interfacing makes them too thick. I'd also like to try turning the flags out next time instead of finishing them with pinking shears.

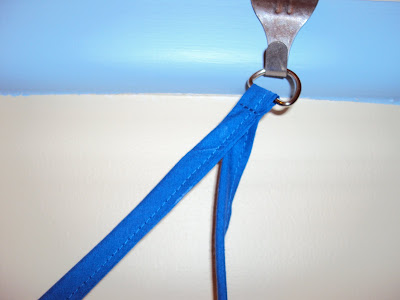
I cheated and bought my bias which I've never done before and wow, soooooooo great and cheap too without *wasting* so much fabric (that always annoys me, especially when it's the really nice, more expensive fabrics). I loved the idea of attaching the D rings which I saw on another blog I love to read, Badskirt's blog. I think next time I will make my triangles smaller and space them closer together, otherwise I'm happy with my first attempt at bunting :)


Mel thank you for such a fantastic blog entry thanking me for the gifts, I am so happy that you love them.

Opening Day - What I Received

Today is opening day for our beginners sewing group swap. I opted to sew one item for someone and in turn nominted my Miss M to receive a gift. I will blog what I sewed once I know it has been received and opened, so stay tuned!

I was a bit naughty and opened my present last night, about 1/2 hour before midnight so almost on the official opening day (close enough!) I was so excited to see a beautiful kitty cat made by the gorgeous Emma who has become a good cyber buddy of mine. (Emma was also kind enough to organise the swap, thank you Emma!)

Catty has a zipper on her tummy and is a PJ bag, awesome idea! She is so well sewn and was originally a pillow pattern that Emma adjusted to make into a PJ bag pattern - sooooo clever!

The kitty cat was nicknamed "Catty" by Emma's little boy, who fell in love with Catty and was very upset when she had to be packed up and sent away. Emma has shown me photos (which I'm sure she'll put on her blog) of her boys loving and playing with Catty.

Last night I put Catty into bed beside M and woke up to a very excited little girl who thought Santa or the Tooth Fairy had been to visit. It was love at first sight for M who is completely crazy about cats. She loves that Catty has dots all over her and for that reason is calling Catty a leopard. M has not put Catty down all morning and has even taken her to school with her today. Because Catty is quite big, she has prime position by the window next to the teacher's desk.

Emma you have made my little girl very happy indeed, Catty is beautiful and I know how hard it would have been to take her away from your little men who adored her. I assure you she will be very loved here in her new home - thank you!


Sorry, blurry pic, but this is M getting ready for school still holding Catty!


Multi tasking!

Romi Jade's Lighting Giveaway

Check out this fantastic giveaway at Romi Jade's blog.

It really bugs me that I need 3 lights on when I sew at night and if anything this giveaway has made me realise I should invest in some great lighting.

Oh to win!

A, B, C's

I wandered into the op shop this morning and picked up this single doona and pillowcase set. Then I put it down again and wandered off. Then I walked back to the set and picked it up again. This fabric isn't my usual taste but for some reason I like it, it's cute. So I parted with my $4 and bought it.

What on earth am I going to do with it?

Fabric Shoppe Giveaway

Blogging this before I forget....the Fabric Shoppe is having a beautiful giveaway which can be found here. Be sure to take a look!

Caroline Dress V2

Here is the Caroline I made for tomorrow's party. The imperfections of the first Caroline Dress were probably not as noticeable this time around. I cut more of a notch than a chunk as a starting point for overlocking and I think the finish was a bit tidier. My hand stitching is terrible so this time I sewed the end of the tie closed instead. Not as nice a finish but it's hardly going to jump out at you. I am so glad I found the tip about tucking the thread tails back into the overlocked seam, makes for such a neat finish.

I don't even know tomorrow's birthday girl so I really hope she is into pink, I'm in trouble if she's not.


Unfortunately this was the best pic I could get of the dress being modelled

Caroline Dress

I have been wanting to make the Caroline Dress for ages now and with 2 more birthday parties this weekend and the need to move on from popover sundresses, what better opportunity. The Caroline Dress is another great pattern from Frog Legs and Ponytails.

I loved making the Amelia Shirt (also by Frog Legs and Ponytails). It was a great beginner's pattern and I can now vouch for the Caroline being just as easy with a fabulous end result.

I made this dress for Miss P's birthday party tomorrow. I am pretty sure she likes purple and when I think about it, she is more of a purple girl than a pink girl. M, (P's mum), if you are reading this, pretend you didn't see it LOL!

I used my overlocker (serger for the international readers) and was having problems with the thread hanging off the edge. I was dreading tweaking the knobs and dials for fear of messing things up too much. I ended up adjusting the cutting knife dial and it worked! So the side seam on the main body isn't perfect but I was really happy with every other edge I overlocked. I also didn't know what to do with the tails of the overlocked threads so I did a google and found this website that had some really helpful photos. I couldn't believe my luck when I discovered that I actually had a large needle with a blunt end. The tails look so much better tucked into the seam like that.

I also want to practice starting and finishing overlocking a circular piece of fabric. After another google I found this tip. I cut more of a rectangle chunk out of my fabric (will try more of a notch next time) and it looks a bit messy where I have tried to finish it off but it's all trial and error I will get there eventually!

This has been a long post, time for some pics.


Wine Tote

My friend's mother in law is currently visiting Australia from New Zealand. Each of my friend's 3 kids own something that I have sewn for them so naturally sewing came up in conversation the other day.

She asked me if I would mind making her a bag to carry her wine in since the bottle in the brown paper bag just isn't the look she is going for.

Off I went in search of a tute. I couldn't find anything I liked the look of so decided to try Flickr instead. I found this lovely wine tote which led me to a blog where I found the tute to make it.

I agree with penny carnival that the bag isn't quite snug enough around the bottle. I'm about to make another one and hopefully I can adjust the measurements (without messing up the whole thing) and make it a tighter fit.

Here is my version made with decor weight fabric for both exterior and lining and a layer of pellon in between. It was the first time I've had to square off a bottom and it totally did my head in and I'm still not sure if I've done it right (the bottom of my bag looks different to the one in the tute).

Anyway.....


Sorry about the blurry photo but I wanted to put in a shot of the bag in action

Flipsy Skirt

I posted a pic of my Flipsy Skirt fabric way back in May when I first started sewing and blogging. I started making the skirt not long after but sadly it has been sitting in the corner for the last 3 months as a UFO.

I've made all of the loops for the skirt but the idea of sewing 20 buttons on has left me completely unmotivated to finish. I know it's not even going to be that bad to do, I just don't want to do it. The buttons I've got are all mismatched in pinks and greens and very cute.....I just don't want to do it! I know there are many Flipsy's out there minus loops, belts, buttons etc but I would like to *officially* finish this skirt.

As M was choosing something to wear to a birthday party today, the Flipsy popped into my head so I asked M if she wanted to wear it and she said....YES!

Then I decided how cute a matching headband would look with it (yep, loving these headbands) so I made one up and geez that felt good to be able to whip something up for her at the last minute (hey it was only a little something but still!)

I'll have to get a better photo of the flip side, it's the same fabric I used in the popover sundress here. Oh and I opted out of the stripey fabric altogether (what was I thinking?).

I tried to negotiate no socks, I lost.


Must take some better pics of the flip side


Another Popover Sundress

I'm officially over making these! There are so many things I want to try sewing that when I'm making something for the 3rd time I just want to finish it because I'm itching to start on the next thing. Does that sound like someone who is new to sewing or what?!

Having said that, I love how this little sundress turned out. I made it for Miss R's 5th birthday party today and secretly (or not so secretly now) wish I could have kept it for my Miss M. I love love love the brown and pink combo and the dots are just too cute.

The headband is the icing on the cute cake don't you think?

Oh yes, there will be more popover sundresses and headbands, after all, there is another party next weekend yet to sew for.

Please excuse my little man, your eyes haven't failed you, he does indeed not have any pants on. I have deemed this photo ok for viewing since you can't see any of his dangly bits. I have deemed the photo of him peeing on the grass not so suitable and have therefore not uploaded that one!


Buttercup Bag

I kept stumbling across versions of this free Buttercup Bag pattern from Made by Rae so I decided I would make one.

M has been waiting very patiently for me to make her something out of some Tweety Bird fabric we bought from SL months ago, actually it was probably one of my very first fabric purchases.

I'm disappointed with the top band on the bag, why did it turn out so skinny?? I interfaced everything and sewed the strap in between the layers instead of sewing it onto the outside like the pattern says. The magnetic clasp is probably too strong for this little bag but I only had a large clasp on hand. I love love love the bright yellow stars used for the lining. It's the perfect sized bag for a child, I would like to try making it again though after enlarging the pattern, apparently 130% is a good size.

Miss M is very happy with her new bag. When I get a chance I will make her a skirt in the same Tweety Bird fabric, she loves Tweety!


Mmmmm nice, bright yellow!


School Holiday Sewing

I had some trouble the first time around when making the Make it Perfect Little Explorer pants. No use trying to hide the fact that I'm a beginner sewer and sometimes the littlest things just don't make sense to me...how was I to know I was cutting out 2 left legs per pair?? So I cut out the other legs and then both pairs officially sat there and became UFO's - until now. My little man has scored both of these pairs so the initial mistake was a good thing in the end because otherwise I probably wouldn't have got around to making him any in time for this summer.

I luuuuurve the stripey trim on this pair.


I've done the star trim before for my nephew but on this pair I did a stripey pocket instead of the denim.


I had a lot more success with this Oliver + S Popover Sundress than my first try. This one is *almost* perfect.


Last of all I made a cute and quick headband to match the O+S dress. These are both being sent off to Miss S for her 6th birthday which has been and gone. (I get there eventually but I do need to work on getting presents to people on time!) I will definitely be making more of these headbands. I used the tute by Blue Bird Studio and the headband you see on my almost 6 year old daughter's head started out as a 5" x 20" sized piece of fabric. The first headband I did was too tight for her head at 18" long, but would be perfect for a toddler.


I also need to give a huge shout out to my amazing parents who have helped me so much these holidays with my kids and without their help I would be nowhere near getting these 4 things finished (or surviving the last 2 weeks) - THANK YOU!!